Unity3D is a game engine that provides a platform for creating interactive and immersive experiences. In order to optimize the performance of a Unity project, it is important to consider the size of assets such as images. Image compression in Unity3D reduces the file size of an image while maintaining its visual quality. This leads to faster load times, lower memory usage, and improved overall performance.
There are several different compression settings available in Unity3D for images, including:
- RAW: No compression is applied to the image. This results in high quality and large file size.
- RGB Compressed DXT1: Compresses the image in a format that supports RGB data, with a 8:1 compression ratio.
- RGBA Compressed DXT5: Compresses the image in a format that supports RGB and alpha data, with a 4:1 compression ratio.
- RGB Compressed ETC2/EAC: Compresses the image in a format that supports RGB data, with a 4:1 compression ratio. This format is supported on mobile platforms.
- RGBA Compressed ETC2/EAC: Compresses the image in a format that supports RGB and alpha data, with a 4:1 compression ratio. This format is supported on mobile platforms.
Choosing the right compression setting depends on the specific needs of a project, such as the platform it is targeting and the visual quality requirements. It is important to experiment with different compression settings to find the best balance between file size and visual quality for a project.
TIP: If you can use a website or software to compress your images before you pull them into Unity you will achieve major strides in getting your world size down before you have done anything in Unity. In some cases for smaller worlds, this should be enough to get your world template size down.
Modifying your Unity Template for Unity
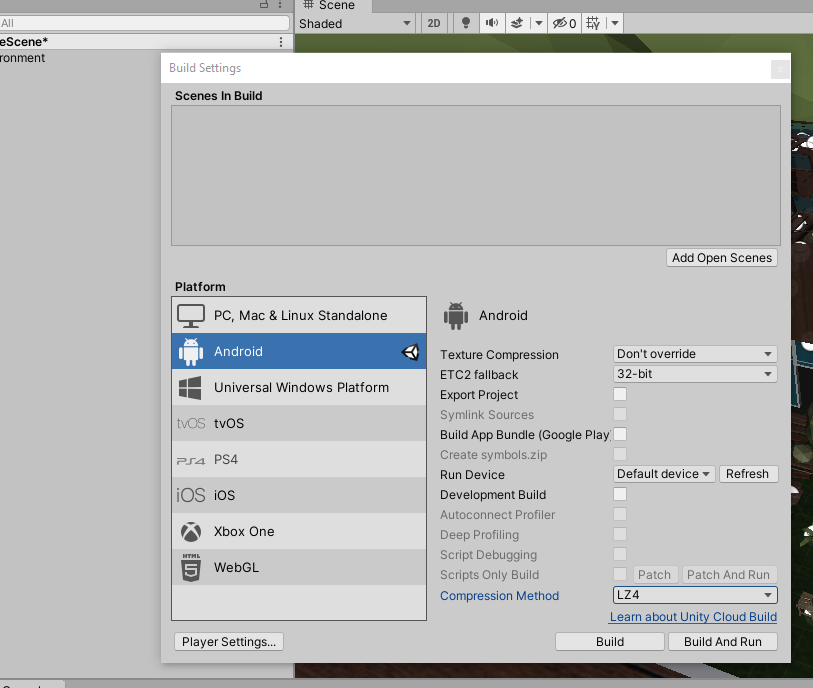
Modify your project settings
LZ4 is a lossless compression algorithm that is widely used in Unity projects to reduce the file size of assets while maintaining their integrity. The difference between LZ4 compression and other compression algorithms used in Unity projects lies in the compression speed and compression ratio.
Here is a comparison chart that summarizes the difference between LZ4 compression and other compression algorithms used in Unity projects:
| Compression Algorithm | Compression Speed | Compression Ratio |
|---|---|---|
| LZ4 | Fast | Moderate |
| LZMA | Slow | High |
| Deflate | Moderate | Moderate |
LZ4 is known for its fast compression and decompression speed, making it a suitable choice for real-time applications like Unity games. While its compression ratio is not as high as LZMA, it is still capable of significantly reducing file sizes. In contrast, LZMA has a higher compression ratio but is slower in both compression and decompression. Deflate is a compromise between LZ4 and LZMA, offering moderate compression and decompression speed and moderate compression ratio.
It is important to note that the choice of compression algorithm for a Unity project depends on the specific requirements and constraints of the project, such as the platform it is targeting, the size of assets, and the performance requirements.
Compressing your textures
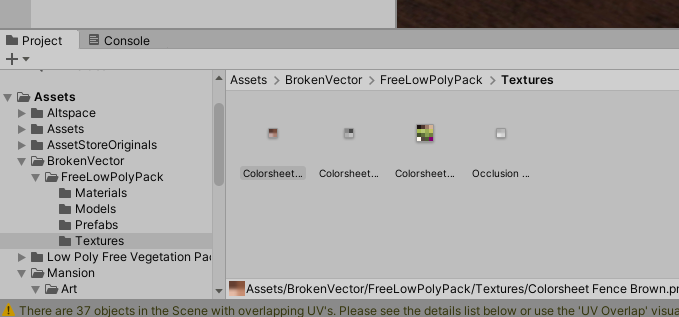
Where to find assets to compress
You will be using the inspector tab to compress textures but first, you will need to open up your texture folders which are normally labelled appropriately. You can find them in your folder hierarchy.
Here are the steps for compressing textures in Unity3D:
- Open your Unity project.
- Locate the Assets folder in the Project window. This is where all the assets for your project are stored.
- Find the folder containing the textures you want to compress. The textures are usually stored in a subfolder within the Assets folder.
- Select the textures you want to compress.
- In the Inspector window, find the Texture Import Settings section.
- In the Texture Import Settings section, you will see the options for compressing the textures.
- Choose the compression method you want to use from the following options:
| Compression Method | Description |
|---|---|
| None | No compression is applied. This results in high quality and large file size. |
| RGB Compressed DXT1 | Compresses the image in a format that supports RGB data, with a 8:1 compression ratio. |
| RGBA Compressed DXT5 | Compresses the image in a format that supports RGB and alpha data, with a 4:1 compression ratio. |
| RGB Compressed ETC2/EAC | Compresses the image in a format that supports RGB data, with a 4:1 compression ratio. This format is supported on mobile platforms. |
| RGBA Compressed ETC2/EAC | Compresses the image in a format that supports RGB and alpha data, with a 4:1 compression ratio. This format is supported on mobile platforms. |
- Apply the changes and save your project.
Note: The compression method you choose will depend on the specific requirements and constraints of your project, such as the platform you are targeting, the size of your assets, and the performance requirements. It is important to experiment with different compression methods to find the best balance between file size and visual quality for your project.
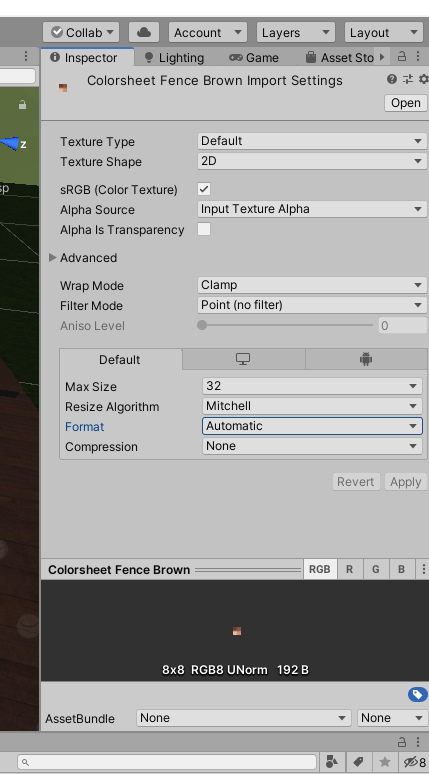
In the inspector of the texture, you can select the compression for the particular image file. There are a few things to take into consideration with these options the first one is the three tabs.
- Default
- Desktop
- Android
For AltSpace I work with the default but you could compress images based on the device they are using. So if you wanted to allow PC to have better detailing in your world you would modify the default (basic compression) and you would apply further compression for the Android.
You typically on AltSpace want people to have the same experience so I work with the default so that the changes I make effect the Android and PC versions which reduces my workload.
It is a tedious task but compressing your textures allows you to reduce your end zip file size without much noticeable compromise in quality.
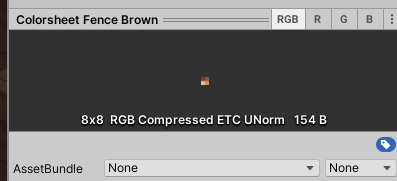
Lightmaps can increase your world size
If you are after higher-quality worlds you will need to spend more time on lighting, lighting is generated by rendering image files that overlay and add detailing. There is also another time of lighting known as probe or realtime lighting which is generated from in reatime. In this article, I will just be talking about lightmaps and reflection probes.
- Depending on what kind of world you are making you may not need to generate lightmaps to achieve what you want. If you aren’t fussed, disable light maps.
- Lightmaps can also be compressed themselves like a material so after they have been generated. Disable auto-generate and compress your lightmaps just to save extra space in your final build.
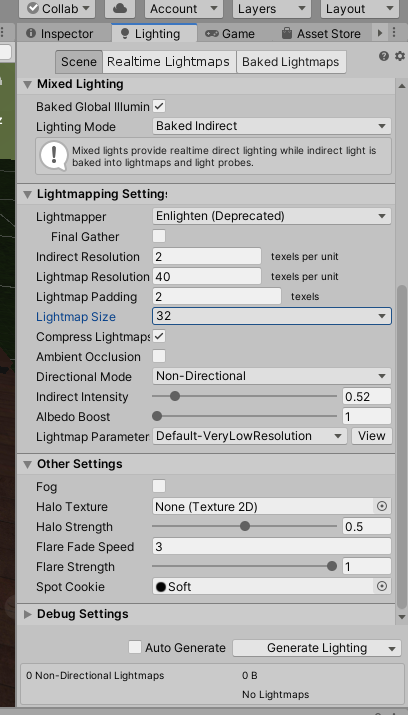
What can factor into your lightmap sizes
Lightmaps are based on your textures to a degree so it would make sense to compress your textures before you generated your lightmaps.
Mixed Lighting mode also factors into the size if you are baking indirectly or using subtractive mode in your lighting.
I personally use subtractive (pictured below) for my mixed lighting because it offers in my opinion the ability to have baked lighting without the heavy image files.
In the light mapping settings, you can change the lightmap parameter to a lower resolution. You can also reduce the resolution and intensity of some of the settings but I don’t know enough about them to comment.
Compressing reflection probes
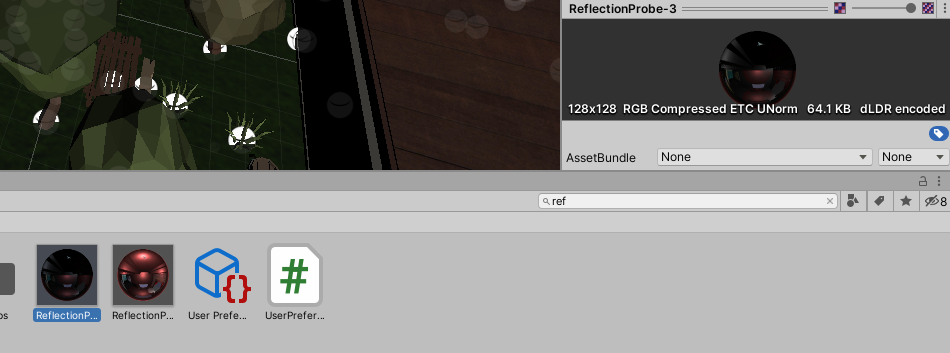
Just like compressing materials you can also compress reflection probes. Some probes you may wish to compress, some you may need to leave untouched. But a simple way to find the reflection probes is to search for ‘ref’ in your project as reflection probes are named accordingly.
Final notes
- Use smaller but detailed textures that you can tile to achieve the same result where possible.
- I’m no expert so play around with the settings and you will discover different outcomes that may not work for the current project but may benefit you in another.
- Backup your work before you do any of this
- Backup your backups
- If you have backed up your work don’t be afraid to make mistakes because you will become faster at fixing your mistakes next time and know what to not to do.
