Installing ProBuilder
ProBuilder is one of the most useful tools for beginners building inside Unity. It lets you create simple geometry directly in the editor instead of relying on external 3D software for every wall, floor, platform, or test room.
For VRChat world building, ProBuilder is especially useful during the early stage of a project because it helps you test layout, scale, and movement before you spend time on detailed art.
If you are new to Unity, the easiest way to think about ProBuilder is this:
- Unity normally places pre-made objects into a scene.
- ProBuilder lets you build those placeholder objects directly in Unity.
That makes it ideal for:
- Greyboxing rooms
- Testing door heights and hallway widths
- Blocking out stages, social areas, and corridors
- Creating quick prototype meshes before final assets exist
Install ProBuilder from Unity Registry, then confirm the tools appear before you start blocking out a real scene.
- Open Window -> Package Manager and switch the package source to Unity Registry.
- Search for ProBuilder, select the official Unity package, and click Install.
- If search does not find it, use Install package by name with
com.unity.probuilder. - Open Tools -> ProBuilder -> ProBuilder Window and create a simple test shape.
For VRChat worlds, use ProBuilder for early blockouts and scale tests. Replace or optimize temporary geometry before publishing if the final world needs cleaner meshes, UVs, or performance tuning.
What ProBuilder Is Good For
Before installing it, it helps to understand when to use it.
ProBuilder is best for:
- Fast blockouts and prototype environments
- Simple level geometry
- Layout testing
- Editing faces, edges, and vertices in Unity
It is not usually the best tool for:
- High-detail final art
- Complex sculpted models
- Character modeling
- Detailed UV work compared to full DCC tools like Blender
For beginners, that distinction matters. ProBuilder is a layout and prototype tool first, not a full replacement for dedicated 3D modeling software.
Playlist Companion
These Unity videos fit here because they show the exact kind of early greyboxing and in-editor modeling workflow people usually want right after they finish installing ProBuilder.
ProBuilder for grey-boxing in Unity
3D modeling with ProBuilder in Unity
Before You Install
Make sure the following are true:
- Unity opens normally.
- Your project is already created.
- The Console does not have major red errors unrelated to ProBuilder.
- You have permission to install packages into the project.
- The project is using the Unity version you actually plan to build with.
If your project is already unstable, install problems can be harder to diagnose because the package is not always the real cause.
For VRChat projects, open the same project you created or manage through the VRChat Creator Companion. Installing ProBuilder into a test project does not make it available in your real world project.
1. Open Package Manager
Unity installs ProBuilder through the Package Manager.
- Open your Unity project.
- In the top menu, go to Window -> Package Manager.
- Wait for the Package Manager window to load fully.
- In the top-left package source dropdown, select Unity Registry.
That last part is important. Beginners often search the wrong list and think the package is missing.
If you only search inside In Project, you may not see ProBuilder unless it is already installed.
Package Manager has a few different views, and they mean different things:
| Package Manager view | What it shows | Use it for |
|---|---|---|
| Unity Registry | Packages Unity can install into the project | Finding and installing ProBuilder. |
| In Project | Packages already installed in this project | Checking whether ProBuilder is already installed. |
| My Assets | Asset Store assets linked to your account | Downloaded assets, not the normal ProBuilder install path. |
If ProBuilder Does Not Appear In Search
Unity's Package Manager can install a UPM package by exact package name. For ProBuilder, Unity's package name is:
com.unity.probuilderUse the name fallback like this:
- Open Window -> Package Manager.
- Click the install button in the Package Manager toolbar.
- Choose Install package by name.
- Enter
com.unity.probuilderas the package name. - Leave the version field blank unless you have a specific source-backed reason to pin a version.
- Click Install and wait for Unity to finish resolving packages and compiling scripts.
If Unity cannot find the package name, stop and check your Unity version, project package settings, network connection, and Package Manager status bar. Do not paste random package names from comments or old tutorials into a production VRChat project.
Pre-release And Experimental Package Visibility
ProBuilder is a released Unity package in current Unity documentation. You should not need experimental package visibility just to install ProBuilder.
If a package guide tells you to enable pre-release packages, the current Unity path is Edit -> Project Settings -> Package Manager -> Show Pre-release Package Versions. Unity documents experimental packages separately and warns that they are not supported and usually hidden from normal Package Manager browsing.
For VRChat projects, keep this conservative: use released packages first, test in a copy, and avoid experimental packages unless a current official source specifically requires them.
Unity ProBuilder Install Quick Answer
The normal Unity ProBuilder install path is Window -> Package Manager -> Unity Registry -> ProBuilder -> Install. ProBuilder has been distributed through Package Manager for modern Unity versions, so you usually do not need a separate Asset Store download or a copied package folder.
If you are searching for unity probuilder install or unity pro builder install, check these details first:
| What you need | What to do |
|---|---|
| Install ProBuilder in a new project | Use Package Manager in the project where you want to build. |
| Add ProBuilder to a VRChat world | Open the VRChat Creator Companion project in Unity, then install ProBuilder there. |
| Find ProBuilder after install | Open Tools -> ProBuilder -> ProBuilder Window after script compilation finishes. |
| Update an older project | Back up the project, check Unity version compatibility, then update through Package Manager. |
If you are following an older tutorial and the Package Manager window looks slightly different, focus on the same idea: find the official Unity ProBuilder package from the registry, then install it into the current project.
2. Search for ProBuilder
Once Package Manager is open:
- Use the search field.
- Search for ProBuilder.
- Select the official Unity ProBuilder package from the results.
When you click the package, read the panel on the right. This usually shows:
- Package name.
- Version.
- Description.
- Install or Update button.
Make sure the package is the official Unity ProBuilder package. Avoid installing random similarly named assets when all you need is the built-in Unity package.
3. Install the Package
- Click Install.
- Wait for Unity to finish importing the package.
- Let script compilation complete before clicking around too much.
During installation, Unity may briefly feel unresponsive. That is normal while packages are being imported and scripts are compiling.
Do not close Unity halfway through unless it is completely frozen for a long period and you are certain it is stuck.
After the install completes, save your project. That gives Unity a clean point to return to if you later change packages, restart the editor, or move the project between machines.
Optional: Import ProBuilder Render Pipeline Samples
Unity's ProBuilder install documentation notes that URP or HDRP projects need the matching ProBuilder shader support samples if you want vertex colors and textures to display correctly in those render pipelines.
If your project uses URP or HDRP:
- Open Window -> Package Manager.
- Select ProBuilder.
- Expand the Samples section in the package details panel.
- Import the support item that matches your render pipeline.
Unity imports those files under Assets/Samples/ProBuilder/<version>. If you are only doing a simple greybox, you may not need to solve every material question immediately, but this is the official path when ProBuilder vertex colors or textures do not display correctly in URP or HDRP.
4. Open the ProBuilder Tools
After installation:
- Go to Tools -> ProBuilder -> ProBuilder Window.
- Dock the ProBuilder window somewhere convenient.
- Create a test shape to confirm the package is working.
If the menu appears and you can create a simple cube, stair, or plane, the installation is usually fine.
For a first test, keep the shape boring. A simple floor and wall tells you more than a complex object because it proves the package, scene view handles, and object creation workflow are all working.
 1
2
3
1
2
3
5. Do a Basic Test
It is a good idea to confirm the tool is working before using it in a real scene.
Try this:
- Create a new empty scene or use a test scene.
- Open the ProBuilder tools.
- Create a simple floor.
- Create a wall.
- Move, scale, and duplicate those objects.
- Enter Play Mode and confirm the geometry behaves as expected.
This tells you:
- The package installed correctly.
- The tools are accessible.
- The geometry is being created normally.
VRChat Blockout Checks
After ProBuilder works, do one small VRChat-style sanity check before building a full room:
- Make a floor, wall, doorway, and simple platform.
- Drop in your normal player reference or avatar scale reference.
- Walk through the space in Play Mode or test it with your usual world-testing workflow.
- Check whether doorways, stairs, sightlines, and gathering areas feel comfortable.
- Rename the blockout objects so they are easy to replace later.
This is where ProBuilder earns its keep. You are not trying to make final art yet; you are trying to find layout problems while they are still cheap to fix.
Optional Companion Packages
Depending on your workflow, you may also want:
- TextMeshPro for in-world labels, menus, and signs
- Cinemachine for camera work and previews
- Polybrush if your Unity version still supports it and you want mesh painting, sculpting, texture blending, or prefab scattering workflows
Older tutorials may also mention ProGrids. Whether you need that depends on your Unity version and current workflow, because grid snapping tools changed over time in Unity.
If you are mainly building VRChat worlds, install only what you need. Extra packages are not automatically bad, but they do add more moving parts to the project.
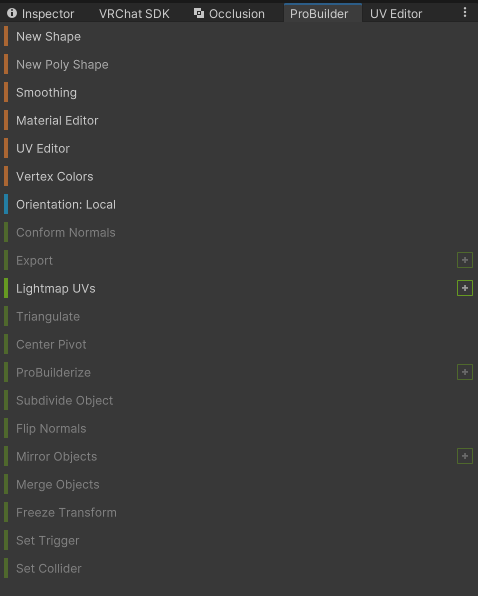
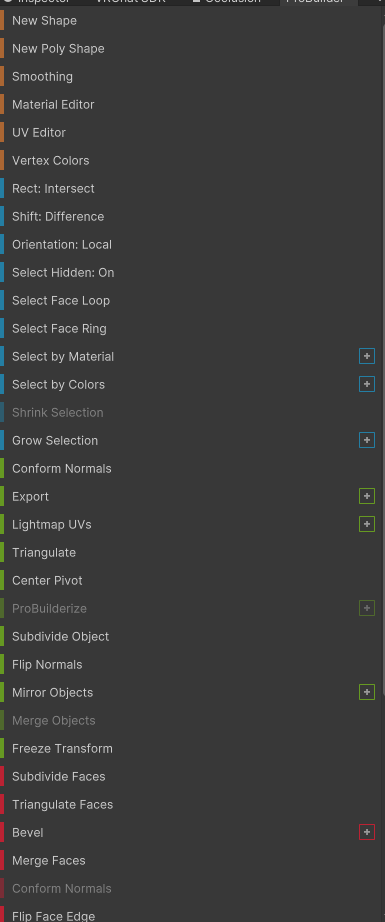
ProBuilder Tools, Shortcuts, And UV Editor Notes
Most beginners only need a small part of the ProBuilder toolset at first:
- New Shape to create floors, walls, stairs, doors, platforms, and rough room pieces.
- Object, Vertex, Edge, and Face modes to change the shape after it exists.
- Extrude, inset, bridge, bevel, and loop selection tools for common mesh edits.
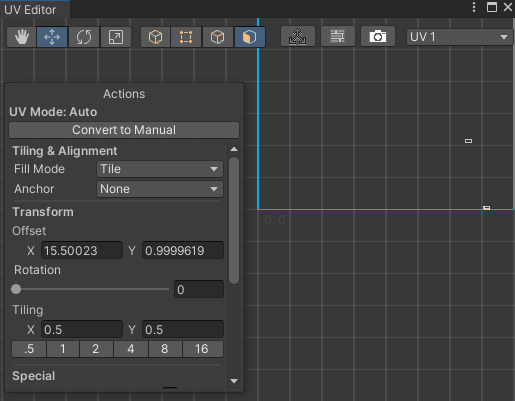
- UV editor tools when you need a material or texture to line up better on a ProBuilder mesh.
- Snapping and grid controls when the blockout needs clean room scale and aligned walls.
ProBuilder shortcuts and hotkeys can speed up editing, but do not start by memorizing everything. First learn where the ProBuilder window is, how to switch edit modes, and how to recover if a face or edge selection behaves unexpectedly.
How Beginners Usually Use ProBuilder
A good beginner workflow looks like this:
- Install ProBuilder.
- Create a rough room or environment layout.
- Test the proportions in first person or VR.
- Adjust the layout until it feels correct.
- Replace some or all placeholder geometry later with final assets.
That process is much faster than trying to make everything perfect from the start.
Common Installation Problems
Help! ProBuilder does not appear in Package Manager.
Switch the package source to Unity Registry, clear the search field, search for ProBuilder again, and wait a few moments for Package Manager to refresh.
The install finished, but the ProBuilder tools do not show up.
Wait for Unity to finish compiling scripts, then reopen Tools -> ProBuilder. If the menu is still missing, restart Unity and check the Console for compile errors.
Console errors appeared after installation.
Check whether the project already had errors before installing ProBuilder. Save your scene, restart Unity, reopen the project, and re-check the Console before assuming ProBuilder caused the issue.
Package Manager says ProBuilder is already installed.
Switch to In Project, select ProBuilder, and check whether the package is installed and enabled. If the tools are still missing, wait for compilation to finish, restart Unity, and check for Console errors that may be blocking editor menus.
An older tutorial shows a different ProBuilder menu.
Unity package interfaces change over time. Look for the same core actions: opening the ProBuilder window, creating a shape, switching edit modes, and editing faces, edges, or vertices.
Is ProBuilder installed from Unity Registry or the Asset Store?
Use Unity Registry in Package Manager for the normal ProBuilder package install. Asset Store listings and old package copies are not the usual path for modern Unity projects.
Where are the ProBuilder shortcuts and hotkeys?
Open the ProBuilder window first, then check the tooltips, Unity shortcuts, and ProBuilder documentation for the version installed in your project. Learn mode switching and shape creation before relying on hotkeys.
Do I need the ProBuilder UV editor for VRChat worlds?
Sometimes. For rough blockouts, basic materials are enough. Use the UV editor when a ProBuilder surface needs cleaner texture scale or alignment, then consider replacing important final meshes with cleaner art assets later.
Good Practices After Installing
Once ProBuilder is working:
- Keep your blockout objects organized in the Hierarchy.
- Use clear names for rooms and sections.
- Keep a separate blockout scene if the project grows large.
- Do not jump into detail work too early.
- Use ProBuilder to answer layout questions before you commit to final meshes.
The biggest advantage of ProBuilder is speed. You lose that advantage if you start treating every temporary shape like finished art.
Installation Complete Checklist
You are ready to move on when:
- ProBuilder appears under the Unity tools menu.
- You can create a simple shape.
- You can move, scale, duplicate, and delete that shape.
- The Console is not showing package-related compile errors.
- You understand whether the ProBuilder objects are temporary blockout meshes or part of the final world.
If any of those checks fail, fix the install before using ProBuilder in a larger scene. It is much easier to troubleshoot one test shape than a half-built level.
When to Move Beyond ProBuilder
You do not need to replace every ProBuilder object immediately. But as your project matures, ask:
- Is this still just layout geometry?
- Does this object now need better UVs, materials, or optimization?
- Would a final mesh from Blender or another tool be more appropriate?
That helps you decide what should stay as blockout and what should be replaced.
Helpful follow-up pages
- ProBuilder
- ProBuilder Blockout Workflow for VR Worlds
- Installing ProGrids
- ProGrids
- Creating a new Unity project
- VRChat World Building
References
- Unity Package Manager window
- Unity Manual: Install a UPM package by name
- Unity Manual: Package Manager project settings
- Unity Manual: Pre-release packages
- Unity Manual: Experimental packages
- Unity ProBuilder installation documentation
- Unity ProBuilder package manual
- Unity video: ProBuilder for grey-boxing in Unity
- Unity video: 3D modeling with ProBuilder in Unity
Next Step
Once ProBuilder is installed and working, continue with ProBuilder Blockout Workflow for VR Worlds.