Installing ProGrids
ProGrids was a Unity tool for snapping objects cleanly to a grid, which made modular building much easier. A lot of older tutorials still mention it because it helped with blockouts, room alignment, wall placement, and keeping scale consistent.
If you are following older world-building guides, it is useful to understand what ProGrids did, but in many current Unity workflows you may use Unity's built-in grid snapping instead.
Check Unity's built-in grid snapping first, then install ProGrids only if your Unity version and tutorial workflow genuinely need it.
- Open your project and test Edit -> Grid and Snap Settings or the Scene view grid controls.
- If an older tutorial specifically depends on ProGrids, check Package Manager compatibility.
- Use one small blockout scene to confirm snapping before changing your main VRChat world.
For VRChat worlds, the goal is clean scale and alignment, not installing every older Unity tool. If built-in snapping keeps your floors, walls, and modular pieces aligned, that is usually enough.
Video Companion
This video fits here because it focuses on ProGrids-style snapping and modular alignment directly, which is the exact legacy workflow this page is helping readers understand.
Unity ProGrids workflow video
VRChat blockout follow-up: Modeling - Create Your First VRChat World
What ProGrids Was Used For
ProGrids was popular for:
- Snapping walls, floors, and ceilings into clean positions.
- Building modular interiors.
- Preventing tiny alignment gaps.
- Keeping scale consistent across repeated assets.
- Speeding up blockout work.
For VR and world-building projects, this matters because even small gaps and misalignments become obvious when players move close to surfaces.
Unity's own ProGrids documentation describes it as a scene-view grid and object snapping package. That is the important concept to keep: it helped creators place objects accurately on a grid. The exact package is less important than having a reliable snapping workflow.
Check Whether You Actually Need It
Before spending time looking for ProGrids specifically, first ask what you need:
- If you just want accurate snapping, Unity's built-in grid tools may already be enough.
- If you are following an older tutorial exactly, you may still want ProGrids or an equivalent workflow.
- If your project is already working well with built-in snapping, adding an extra tool may not help.
In many cases, the real goal is not "install ProGrids", it is "build modular content accurately".
How This Fits With ProBuilder And Polybrush
Think of these tools as a sequence, not a pile of optional add-ons:
| Stage | Tool or workflow | What it solves |
|---|---|---|
| Blockout | ProBuilder | Quickly create floors, walls, stairs, platforms, and room shapes directly in Unity. |
| Alignment | ProGrids or Unity's built-in grid snapping | Keep modular pieces on consistent increments so rooms and corridors line up cleanly. |
| Refinement | Polybrush | Add controlled surface variation after the layout and scale already work. |
For VRChat world building, do not start by painting detail. First prove the space works with ProBuilder or simple placeholder meshes, keep the layout aligned with snapping, then use Polybrush-style detail only where the scene needs visual breakup.
ProGrids vs Built-In Grid Snapping
| Question | ProGrids | Built-in Unity snapping |
|---|---|---|
| Best fit | Older tutorials and older compatible Unity projects | Most newer Unity projects |
| Main purpose | Advanced grid/object snapping workflow | Move, rotate, scale, grid, and vertex snapping basics |
| Install step | May require Package Manager compatibility or manual package lookup | Already part of the Unity editor |
| VRChat relevance | Useful if your project version supports it and your workflow depends on it | Usually the safest first choice for modular world layout |
If you are unsure, start with built-in snapping. You can still understand ProGrids tutorials by translating the goal: place objects cleanly on consistent increments.
Installing ProGrids In Older Compatible Projects
Unity's legacy ProGrids package pages list com.unity.progrids as a preview package for older Unity versions. That matters because preview or pre-release package visibility has changed across Unity versions.
If your Unity version and package source still support it:
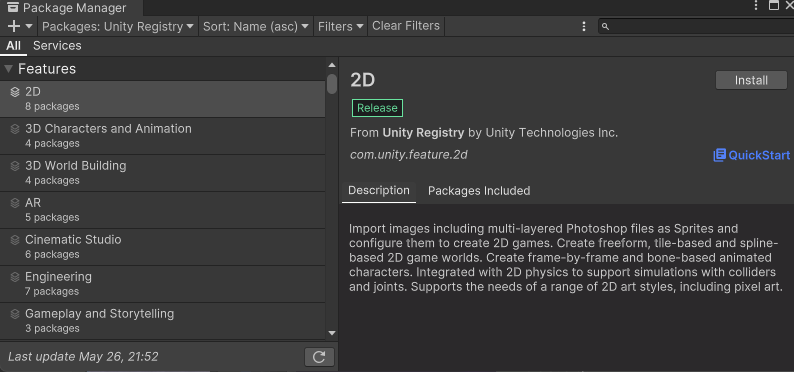
- Open Window -> Package Manager.
- Check Unity Registry first.
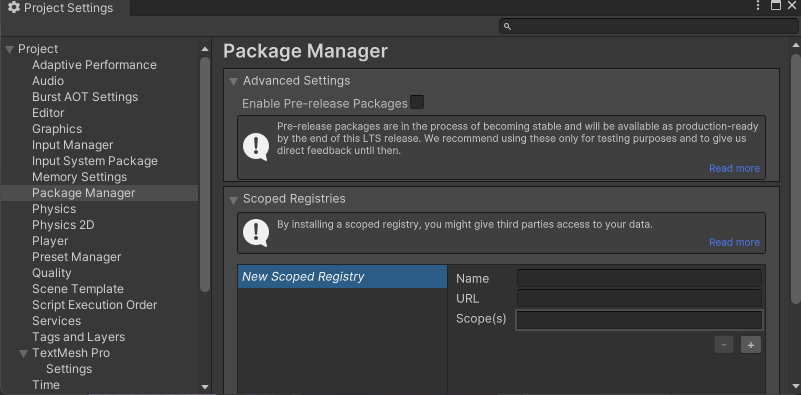
- If the package is hidden and your Unity version supports the setting, open Edit -> Project Settings -> Package Manager and enable Show Pre-release Package Versions.
- Search for ProGrids.
- Install the package if it appears and is compatible.
- Verify the install by opening Tools -> ProGrids -> ProGrids Window.
If it does not appear, the package may no longer be available through the normal package list for your current version.
Some older Unity versions exposed preview packages differently. If a tutorial tells you to enable preview packages and your editor no longer has the same option, do not panic. Unity's package interface has changed over time.
If You Try Manual Package Lookup
In some Unity versions, creators tried adding ProGrids by package name instead of finding it in the visible list. If you attempt that, the historical package name was:
com.unity.progridsUse it through Package Manager -> Install package by name. Only use that route in a test project or backed-up project, and only if you understand that package compatibility can vary by Unity version. If Unity refuses the package, treat that as a sign to use built-in snapping instead.
Do not force ProGrids into a current VRChat project just because an old tutorial used it. The real goal is clean snapping and modular alignment, and Unity's built-in grid tools usually cover that workflow now.
If ProGrids Is Missing
This is common now. In that case, use Unity's built-in snapping tools instead.
Useful built-in options include:
- Move snap increments.
- Rotation snap increments.
- Scale snap increments.
- Grid visibility.
- Vertex snapping where appropriate.
These are enough for most modern modular workflows.
Better Modern Alternative: Built-In Grid Snapping
For most users, this is the better long-term approach.
Use built-in snapping for:
- Room blockouts.
- Corridor alignment.
- Repeated prop placement.
- Modular walls and floor kits.
- Keeping architecture pieces on consistent increments.
Combine it with:
- Clean naming.
- Consistent unit scale.
- Modular asset dimensions such as 1m, 2m, or 4m widths.
- Prefabs for repeated building pieces.
That gives you most of the value ProGrids used to provide.
Good Habits For Modular World Building
Whether you use ProGrids or Unity's built-in snapping, the important habits are the same:
- Choose a base grid size early.
- Keep walls and floors built around consistent dimensions.
- Avoid arbitrary scaling whenever possible.
- Test corners, doorways, and ceilings up close.
- Use prefabs for repeated pieces instead of manually rebuilding everything.
The cleaner your modular system is, the less cleanup you will need later.
VRChat Modular Layout Checklist
Before committing a snapped blockout to your main world, check:
- Doorways are wide enough for the intended avatar scale.
- Floors, stairs, platforms, and ramps do not create awkward movement.
- Walls meet without tiny visible gaps.
- Repeated pieces use prefabs where practical.
- Scale still feels comfortable from a player viewpoint.
- The scene is still easy to edit after snapping is enabled.
Grid tools help with precision, but they do not automatically make a space feel good. Always test the layout from the player's point of view.
Common Problems
Snapping feels inconsistent.
Check the snap increment values. If they are too small or too large for your kit, placement will feel awkward. Choose a simple base unit and stick with it while blocking out.
Pieces still do not line up.
The problem may be the mesh origin, pivot, scale, or asset dimensions rather than the snapping system. Check pivots and real-world dimensions before changing every snap setting.
Imported models never sit correctly on the grid.
This usually means the model was not built to consistent real-world units in Blender, Maya, or another DCC tool before import. Fixing scale at the source is usually cleaner than fighting every placement in Unity.
ProGrids does not appear in Package Manager.
Your Unity version may not expose it in the normal package list. Use Unity's built-in grid snapping first, or test manual package lookup only in a safe project copy.
Recommended Takeaway
If you are working in a newer Unity project, learn the built-in grid snapping tools first. If an older guide mentions ProGrids, treat it as a reference point rather than a strict requirement.
What matters most is accurate placement, consistent scale, and a blockout workflow that helps you build faster without creating alignment problems later.
Helpful follow-up pages
- Installing ProBuilder
- ProBuilder Blockout Workflow for VR Worlds
- ProGrids
- Polybrush
- Package Manager Basics
- Navigating Scene View and Camera Controls
- Package Manager Basics
- Unity3D Layers and Tags
Help! Should I use this tool in my main world immediately?
Try it in a test scene first. Once the workflow is clear, move the cleaned result into the main VRChat project.
Help! The tool created messy geometry or assets.
Clean naming, pivots, materials, and mesh organization before relying on the result. Tool output still needs normal world-building discipline.
References
- Unity legacy manual: ProGrids package
- Unity ProGrids package manual
- Unity ProGrids installation documentation
- Unity Manual: Grid snapping
- Unity Manual: Install a UPM package by name
- Unity Manual: Pre-release packages
- Unity Manual: Experimental packages
- Unity video: ProGrids Intro and Tutorial
- Iconoclass video: Modeling - Create Your First VRChat World