Package Manager Basics
Unity's Package Manager is how you install, update, and manage many of the editor tools and systems used in modern Unity projects. For beginners, it is one of the most important windows to understand because many features are no longer just "built in" by default. Instead, they are installed as packages.
Examples of things commonly handled through packages include:
- ProBuilder
- TextMeshPro
- Cinemachine
- Input systems
- Rendering packages
- Official Unity toolsets
If you are learning Unity, understanding Package Manager early helps you avoid confusion when tutorials mention tools that do not appear to exist in your project yet.
Only change packages when you know why, then let Unity finish compiling before judging whether the change worked.
- Back up the project before installing, removing, or updating packages.
- Use the correct source: Unity Registry for new official packages, In Project for installed ones.
- Change one important package at a time and test before moving on.
VRChat projects are sensitive to Unity version, SDK version, and package dependencies. If a world or avatar project was created through Creator Companion, check that first before manually changing SDK-related packages inside Unity.
Playlist Companion
This video fits here because it shows the exact kind of package-driven tool onboarding beginners usually need once Package Manager stops being theoretical and starts affecting the project directly.
ProBuilder for grey-boxing in Unity
Package install follow-up: Create Avatars & World Projects - VRChat Creator Companion
What Package Manager Actually Does
Think of Package Manager as the place where Unity manages official modular features for the project.
It lets you:
- See what packages are installed
- Install new Unity packages
- Update existing packages
- Remove packages you no longer need
- Check package versions
- Resolve package dependencies when Unity can
This matters because Unity projects can behave differently depending on which packages are installed and which versions they use.
Package Manager changes are stored in the project, not just in your local Unity layout. That is why a package decision can affect other people using the same project folder, a future backup restore, or a VRChat upload attempt weeks later.
How to Open Package Manager
Open it from:
- Window -> Package Manager
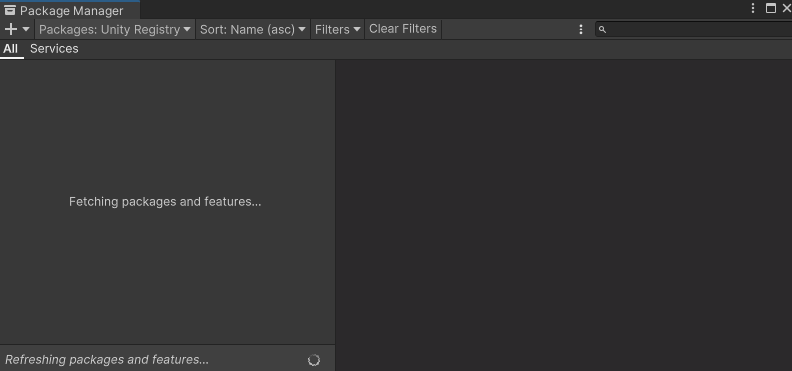
When the window loads, give it a moment to fetch package information. If your internet connection is slow or the package list is refreshing, it may take a moment before everything appears.
The Main Package Sources
One beginner mistake is searching the wrong package source and assuming a package is missing.
The most useful views for beginners are:
| Source | What it means | Use it when |
|---|---|---|
| Unity Registry | Official packages published through Unity | You want to install an official Unity tool such as ProBuilder or a render pipeline package |
| In Project | Packages already installed in the current project | You want to check versions, update a package, or remove something installed |
| My Assets | Asset Store packages tied to your Unity account | You want to import something you own from the Asset Store |
| My Registries | Packages from scoped registries configured for the project | A tool provider gives you a registry URL or package namespace |
Unity Registry
This shows official Unity packages that are available to install. Use this when you want to:
- find a package you do not already have
- browse official package options
- install new Unity tools
In Project
This shows packages that are already installed in the current project. Use this when you want to:
- check what is currently installed
- review package versions
- update or remove packages
If a tutorial says "install ProBuilder" and you are already looking at In Project, you may only see packages that are installed already. Switch to Unity Registry before assuming the package is gone.
Basic Package Install Workflow
To install a package:
- Open Window -> Package Manager
- Switch the source to Unity Registry
- Search for the package name
- Select the package
- Check the package description and version panel
- Click Install
- Wait for Unity to finish importing and compiling
Do not rush away immediately after clicking install. Many packages need time to import and compile scripts before they are actually ready to use.

Install A Package By Name
Sometimes search does not show the package you expected. Unity's Package Manager also supports installing a UPM package by its exact package name. This is useful when official documentation or a trusted guide gives you a package identifier such as com.unity.probuilder.
Use this only when you know the exact package name:
- Open Window -> Package Manager.
- Click the install button in the Package Manager toolbar.
- Choose Install package by name.
- Enter the package Name.
- Optionally enter a specific version only if the official documentation or your project requirements call for it.
- Click Install and let Unity finish resolving packages and compiling scripts.
Unity's documentation is clear that the package name is a unique identifier, not always the same as the display name shown in the editor. If Unity cannot find the package name or version, stop and verify the source instead of guessing.
ProBuilder, Polybrush, And ProGrids Package Names
These are the package names verified against Unity documentation:
| Tool | Package name | Normal approach | Important note |
|---|---|---|---|
| ProBuilder | com.unity.probuilder |
Search ProBuilder in Unity Registry, or install by name if search fails. | Current Unity docs list ProBuilder as a released package and describe it as a tool for custom geometry, prototyping, collision meshes, UV editing, and vertex colors. |
| Polybrush | com.unity.polybrush |
Search Polybrush in Unity Registry, or install by name if available for your editor version. | Unity's Polybrush package docs say it is deprecated and no longer supported in Unity 6.3 and later, so check your Unity version before relying on it. |
| ProGrids | com.unity.progrids |
Prefer Unity's built-in grid snapping first; use manual package lookup only for older compatible projects. | Unity's legacy ProGrids docs list it as a preview package for older Unity versions, not a normal current-package recommendation. |
Pre-release And Experimental Packages
Unity separates package states. For beginners, the practical rules are:
- Released packages are the normal first choice.
- Pre-release packages are hidden by default unless you enable Show Pre-release Package Versions in Edit -> Project Settings -> Package Manager.
- Experimental packages are not supported by Unity and are usually hidden from normal Package Manager browsing.
For VRChat worlds and avatars, avoid experimental packages unless a current official source specifically says your workflow needs them. If you are only trying to install ProBuilder, Polybrush, or understand a ProGrids tutorial, start with the released package or built-in Unity snapping path first.
Package Manager And Packages.json
Behind the scenes, Unity records package dependencies in the project manifest file:
Packages/manifest.json- sometimes
Packages/packages-lock.json
Most beginners should use the Package Manager window instead of manually editing these files. Manual edits are useful when a guide specifically asks for them, but a typo in manifest.json can make Unity report dependency errors before the project opens cleanly.
If you do edit package files manually:
- Close Unity first if the guide says to.
- Copy the current
Packagesfolder or back up the project. - Change only the package entry you meant to change.
- Reopen Unity and read the Console before continuing.
What to Check Before Installing a Package
Before installing something, ask:
- Is this package official and relevant to my project?
- Does my Unity version support it?
- Will it affect an existing workflow?
- Am I following a tutorial that assumes a different Unity version?
- Does the package require another package or render pipeline choice?
Beginners sometimes install packages just because they sound useful. That can create clutter, confusion, and dependency issues later.
Try to install packages with a clear purpose.
For VRChat work, also ask whether the package is allowed and useful for the target. Editor-only tools such as ProBuilder can be useful while building a world, while runtime scripts, render features, or unsupported components may not be appropriate for upload.
How to Update a Package Safely
Updating is not always harmless. A package update can change behavior, break scripts, or alter editor workflows.
A safer update process looks like this:
- Make a backup or commit your work
- Open the package in Package Manager
- Read the version information, changelog, or package notes if available
- Update one package at a time
- Let Unity finish compiling
- Test the project after the update
Do not update many packages all at once unless you are prepared to troubleshoot several changes at the same time.
Why "One Package at a Time" Matters
If you update five packages at once and the project breaks, it becomes harder to tell which one caused the problem.
If you update one package at a time:
- problems are easier to isolate
- rollback decisions are easier
- you understand what changed
That is a much better beginner habit.
How to Remove a Package
If a package is installed but no longer needed:
- Open Package Manager
- Switch to In Project
- Select the package
- Use the remove option if appropriate
Be careful here. Some packages are deeply tied to project systems. Removing the wrong one can break tools, scripts, or render features.
Before removing a package, ask:
- Is anything in the scene using it?
- Are scripts referencing it?
- Is it part of a tutorial or workflow still in use?
- Is another installed package depending on it?
If the remove button is unavailable, the package may be built in, locked by another dependency, or managed by another tool. Do not force-remove package files unless you understand why Unity is keeping them.
Common Beginner Problems
A package does not appear in search.
Check that you are searching the right source. New official packages are usually under Unity Registry, installed packages are under In Project, and third-party registry packages may appear under My Registries only after the project is configured for them.
Install finishes but the tool does not appear.
Wait for Unity to finish compiling, then check the menu location from the package documentation or tutorial. If the Console has red errors, fix the first meaningful error before assuming the package failed.
Unity shows compile errors after a package update.
Update history matters here. Identify the most recent package change, read whether the first Console error comes from your scripts or package code, and consider rolling back that one package before changing unrelated assets.
Package Manager feels stuck or unresponsive.
Give it time to refresh, then reopen the Package Manager window. If Unity itself is clearly stuck, restart the editor and check whether the project opens with dependency errors.
Unity says the project has invalid dependencies.
This usually points back to package manifest or registry resolution problems. Open the project carefully, check Packages/manifest.json, and compare it with a backup or a clean Creator Companion project before deleting package entries.
Practical Beginner Advice
- Use Package Manager intentionally, not casually
- Install only what you currently need
- Keep notes when you update important packages
- Test after every meaningful package change
- Avoid mixing too many workflow changes at once
When Package Manager Is Especially Important
You will rely on Package Manager heavily when:
- following Unity tutorials
- installing official tools
- adding editor extensions
- managing rendering-related systems
- maintaining a project over time
Because of that, learning it properly early saves a lot of future confusion.
Helpful follow-up pages
- Installing ProBuilder
- ProBuilder
- Installing ProGrids
- Polybrush
- Unity Hub Installation
- The project has invalid dependencies (Error)
- Creating a Packages.json file
- Unity Documentation and Manual
Final Advice
Package Manager is one of the places where Unity shifts from "drag things into a scene" to "manage the project like real software." That can feel more technical, but the basic workflow is straightforward once you understand the main sources and the install/update cycle.
For beginners, the safest habits are:
- install with purpose
- update carefully
- test after changes
- avoid large package changes all at once
References
- Unity Manual: Package Manager window reference
- Unity Manual: Install a UPM package by name
- Unity Manual: Package Manager project settings
- Unity Manual: Pre-release packages
- Unity Manual: Experimental packages
- Unity Manual: ProBuilder package
- Unity Manual: Polybrush package
- Unity legacy manual: ProGrids package
- Unity video: ProBuilder for grey-boxing in Unity