I would like to thank TheRealMC and Ryuuzaki from the AltspaceVR community for their help in teaching me under <5 minutes how to do camera mirrors and who both helped me put together some necessary steps to put in this guide.
Mirrors are simply Unity cameras on a plane with a render texture linked to the camera using an unlit URP shader to put it in a nutshell. I will be going through the different steps of creating but also additional tips to make sure your mirror actually ‘mirrors’.
Step 1: #
- Create a basic even plane that you can easily apply a camera to the centre of.
- Create a new material and change it to unlit
- Create a new render texture
- Create a new camera
Watch me get a basic working camera (non-inverted) created within 60 seconds.
Step 2: Config and drag #
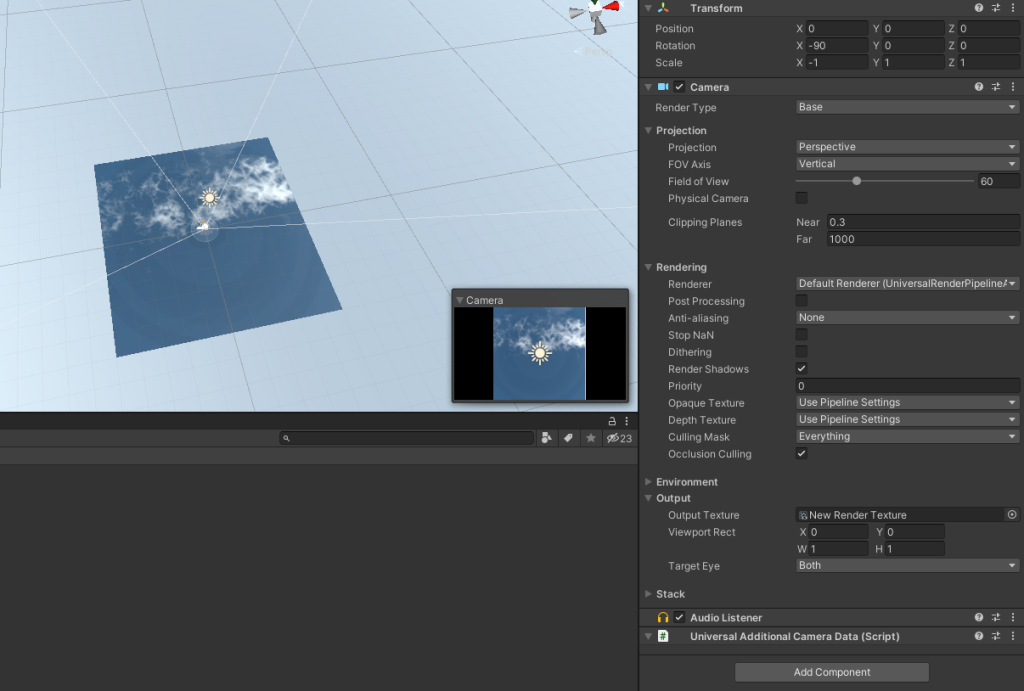
- Centre your camera to be behind the plane and centred
- Ideally, you will want to flip the plane to invert it so it works as an actual mirror
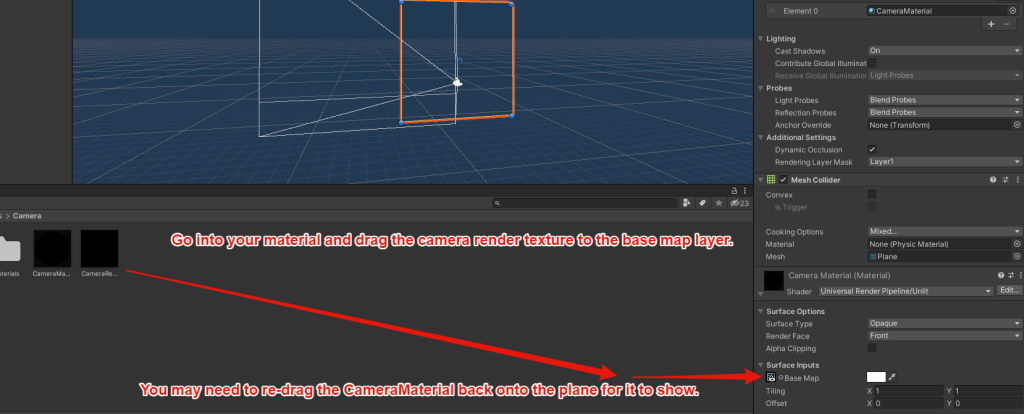
- Drag the render texture created to be the base map layer of your material
Camera Settings (Example) #

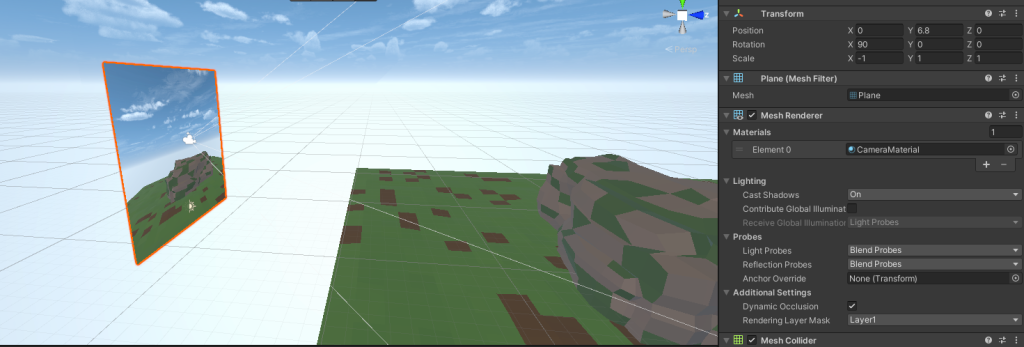
Render Texture Material (Example) #
Considerations (Step 3) #
- You will want to flip the scale of the plane so it is inverted this can be done by setting X or Z to -1 in your scale inspector settings.
- You will want to change the material to be URP > Unlit so that it does not get darkened by scene lighting.
- Centre the plane and camera at 0, 0, 0 coordinates so you can adjust the camera to be just below the plane at -0.002 etc
- You can tweak some of the settings to add a culling mask to ignore UI and other layers

FAQ #
I created a render texture and a normal material and I dragged them both onto my plane and I still don’t have a camera showing.
You need to go into your normal material albedo texture and set the base map layer (example below).


